The handful of knots that actually come up on the job — handline work, hoisting material, dragging poles, and strapping a load down. What each one is for, how to tie it, and where it will let you down.
Handline & hoisting
Getting tools and material up and down. These are the knots you tie the most.
Bowline
also called the king of knotsA fixed loop that won't slip or tighten under load, and unties easily after being loaded hard. The default for hoisting tools, buckets, and hardware on a handline.
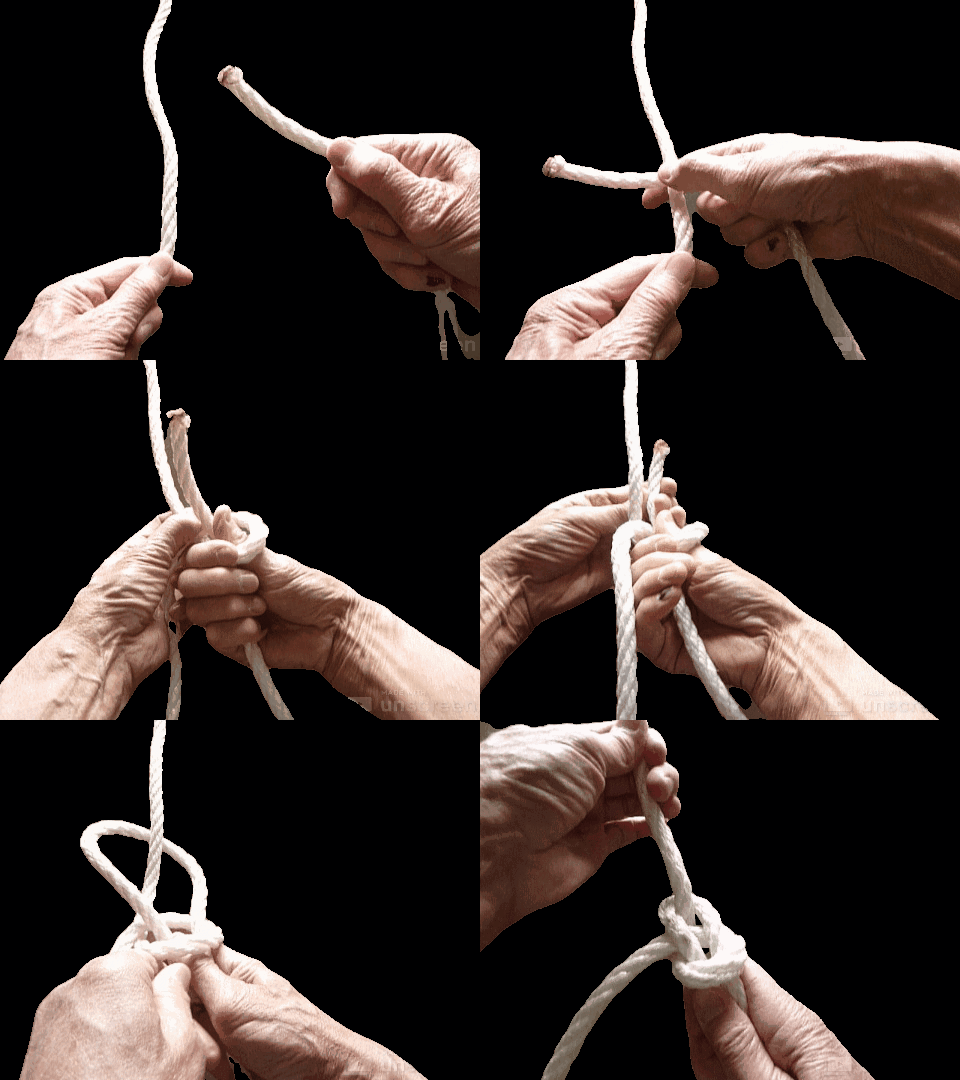
How to tie it
- Make a small overhand loop in the standing part, leaving enough tail for the loop size you want.
- Pass the working end up through that loop from underneath.
- Take the working end around behind the standing part.
- Bring it back down through the small loop, alongside where it came up.
- Dress it — snug all four parts evenly — and set it with a firm pull.
Watch for: Can work loose when the loop is repeatedly slack-loaded or shaken. If the line will go slack, finish with a half hitch or stopper knot on the tail. Leave a tail of at least a hand's width.
Running bowline
A bowline tied around its own standing part so the loop cinches down. For hoisting poles, crossarms, and long stock where you want the line to grab and hold.
How to tie it
- Take the working end around the object and back alongside the standing part.
- Tie a standard bowline in the working end, but pass the loop around the standing part rather than around the object.
- Slide the knot toward the load so the loop closes on the object.
Watch for: It cinches hard under load — plan how you'll release it. On smooth or coated surfaces it can still slide along the length of the object; add a half hitch to control where it sits.
Timber hitch
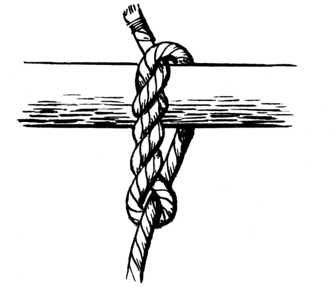
Gripping round stock — poles, logs, bundled conductor. Grips harder the more you pull, then falls apart the moment tension comes off.
How to tie it
- Pass the working end around the pole.
- Wrap the working end around the standing part.
- Tuck the tail back around itself three or more times, following the lay of the rope.
- Pull the standing part to set the wraps against the wood.
Watch for: Needs steady tension in one direction. For dragging or hoisting a pole, add a half hitch near the leading end so the load tracks the way you want instead of swinging.
Clove hitch
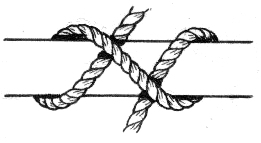
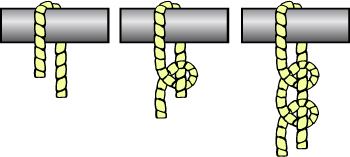
Fast attachment to a pole, crossarm, or rail. Quick to tie, quick to adjust, quick to release.
How to tie it
- Pass the working end around the object.
- Cross over the standing part and pass around the object a second time.
- Tuck the working end under the second wrap so it crosses beneath itself.
- Snug both ends in opposite directions.
Watch for: Slips under variable or rotating loads and on smooth surfaces. Treat it as a temporary or backed-up hitch — finish with two half hitches for anything that matters.
Half hitch
Rarely the whole knot. It's the finisher — backing up a timber hitch, locking a clove hitch, or securing a tail so it can't work loose.
How to tie it
- Pass the working end around the object.
- Tuck it under its own standing part.
- Repeat for a second hitch if you want it to hold on its own.
Watch for: One half hitch alone holds almost nothing. Two is a minimum, and even then it's a backup rather than a primary.
Joining two ropes
When you need more length, or need to pull a heavier line up with a lighter one.
Sheet bend
Joins two ropes, including ropes of different diameter — which is exactly the case when you're using a handline to pull a heavier rope up.
How to tie it
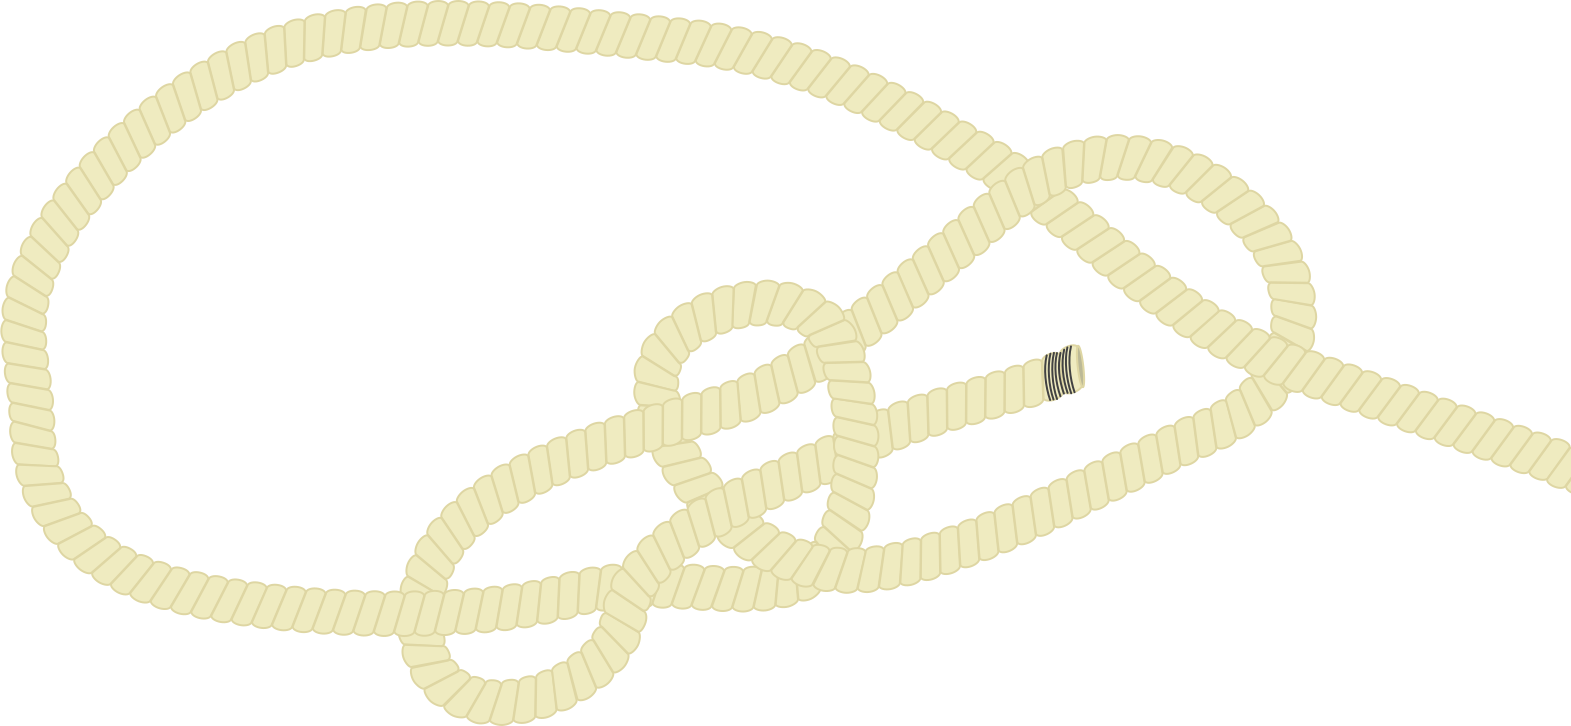
- Form a bight in the thicker rope.
- Pass the thinner rope's working end up through the bight.
- Take it around behind both legs of the bight.
- Tuck it under itself, on top of the bight — not through it.
- Both tails should finish on the same side.
Watch for: Can shake loose when slack. For a big diameter difference, take a second turn around the bight (double sheet bend). Never use a square knot for this — it capsizes and spills under load.
Double fisherman's
also called the grapevineA secure, permanent join. Standard for making prusik loops and slings from cord.
How to tie it
- Lay the two rope ends alongside each other, pointing opposite directions.
- Take one end and make two wraps around the other rope, working back toward itself.
- Tuck it back through both wraps and pull tight.
- Repeat with the other end, mirroring the first.
- Pull the standing parts so the two knots slide together and seat.
Watch for: Effectively permanent once heavily loaded — plan on cutting rather than untying. That's the tradeoff for how secure it is.
Tensioning & securing
Truck and trailer loads, and taking tension off a line.
Trucker's hitch
Gives you mechanical advantage for cinching a load down — the standard for strapping gear on a truck or trailer with rope.
How to tie it
- Anchor one end of the rope.
- Form a loop in the standing part partway along — an alpine butterfly or a simple slipped loop works.
- Pass the working end around the anchor point and back up through that loop.
- Pull down on the working end to tension the line — the loop acts as a turning point.
- Hold the tension and lock it off with two half hitches below the loop.
Watch for: The mechanical advantage is real but friction eats a chunk of it — expect closer to 2:1 than the theoretical 3:1. A slipped loop is quicker to release; an alpine butterfly is stronger and won't jam.
Rolling hitch
Grips another rope or a spar under lengthwise pull. Use it to take tension off a loaded line so you can work the knot at the other end.
How to tie it
- Wrap the working end around the object twice, both wraps on the side the pull will come from.
- Bring it across the standing part.
- Take a third wrap on the other side and tuck under itself.
- Set it so the wraps sit tight and don't override each other.
Watch for: Only holds against pull in one direction. Set the wraps on the correct side or it will slide.
Mid-line loops
When you need a loop somewhere other than the end of the rope.
Alpine butterfly
A loop in the middle of a line that can be loaded from any of three directions without distorting. Also isolates a damaged section of rope.
How to tie it
- Take two turns around your hand, then a third.
- Pass the middle turn over the outer turn nearest your fingertips.
- Bring that same turn back under and up through all the turns.
- Slide it off your hand and pull the loop and both standing parts to set.
Watch for: Won't jam even after heavy loading, which is its main advantage over alternatives. Dress it carefully — a poorly dressed butterfly is easy to mis-tie.
Figure eight on a bight
A strong loop that's easy to inspect visually — you can see at a glance whether it's tied right, which matters when someone else has to check your work.
How to tie it
- Form a bight in the rope.
- Make a loop with the bight, then pass the bight behind the standing parts.
- Bring it back through the loop to form the figure-eight shape.
- Dress it so the strands run parallel with no crossovers.
Watch for: Jams hard after heavy loading — much harder to untie than a bowline. Bulkier too. The tradeoff is inspectability.